Pipe bursts result from causes like frozen pipes, corrosion, high pressure, or aging materials. Quick action is vital for effective repair, focusing on identifying and addressing the root cause for long-term reliability. Assess damage by looking for leaks, corrosion, and water stains, then turn off the main water valve to prevent further flooding. Gather necessary tools, including specialized equipment for complex repairs, and follow steps like locating the main valve, assessing damage, cleaning, priming, and securing new pipe with tape. Regular maintenance through inspection, insulation, and cleaning can prevent costly bursts. Common mistakes include ignoring root causes and not turning off water promptly, leading to increased damage and higher repair costs. For complex or unknown issues, consider professional plumber assistance for proper cause identification and quality repairs.
A burst pipe can cause significant damage, but prompt action can minimize harm. This guide provides an in-depth look at the pipe repair process, from understanding common causes like freezing or pressure buildup to assessing the extent of the damage. We outline the tools needed, offer a step-by-step repair tutorial, share preventive measures, highlight mistakes to avoid, and suggest when to call a professional plumber for expert assistance with your pipe repair needs.
Understanding Burst Pipe Causes
Burst pipe issues can arise from a variety of factors, making prompt action crucial for effective pipe repair. Common causes include frozen pipes that expand and crack under pressure during freezing temperatures, as well as corroded or damaged pipes that weaken over time. High water pressure can also contribute to bursts by exerting excessive force on the pipe walls. Additionally, certain materials, like iron or copper, may become brittle with age, leading to unexpected failures. Identifying the specific cause is essential for selecting the right repair method and ensuring long-term reliability in pipe repairs.
Assessing the Damage
When a burst pipe occurs, the first step in the repair process is assessing the damage. Inspect the affected area to determine the extent of the leak and identify any visible signs of corrosion or damage to surrounding structures. Look for water stains on walls, ceilings, or floors, as these can indicate the location and severity of the burst. Check pipes for any signs of cracking, rusting, or swelling, which could point to underlying issues that need immediate attention.
During the assessment, it’s crucial to turn off the main water supply valve to prevent further flooding. Note down the type and size of pipes involved, as this information will be essential when choosing replacement parts for pipe repair. Additionally, take pictures of the damage for reference and future insurance claims. By thoroughly assessing the situation, you can ensure that the right steps are taken to effectively fix the burst pipe and avoid potential complications.
Tools and Equipment Required

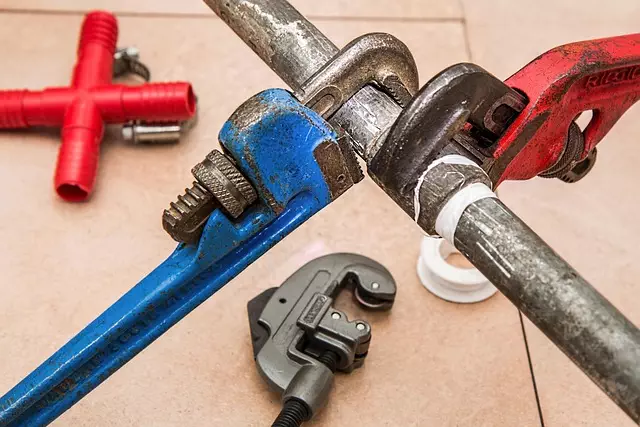
When tackling a burst pipe repair, having the right tools and equipment is essential for a successful and efficient fix. The first step involves gathering basic materials like duct tape, a wrench, pliers, and a replacement pipe section if the damage is extensive. These simple yet crucial items will help you stem the flow of water and temporarily patch the leak until a permanent repair can be made.
For more intricate pipe repairs, additional tools may be required. This could include a saw for cutting away damaged sections, a drill with specific bits for creating holes or expanding existing ones, and a variety of pipe connectors and joints to ensure a secure fit. Remember, the key to an effective pipe repair is preparation, so make sure you have all the necessary tools before beginning the job.
Step-by-Step Repair Process

When a pipe bursts, it’s crucial to act quickly to prevent further damage. Here’s a step-by-step guide for repairing a burst pipe. First, locate and turn off the main water supply valve to stop the flow of water. This is essential to contain the issue and avoid overwhelming your home with water. Once the valve is shut, assess the burst pipe – determine its size and extent of damage.
Next, gather your tools: a new section of piping that matches the original in diameter, couplers, pipe primer, and silicone or PEX (cross-linked polyethylene) tape. Clean the affected area thoroughly to ensure proper adhesion. Apply pipe primer to both the broken ends and the inside of the coupler. Then, tightly secure the new pipe segment using couplers. Finally, wrap the joints with tape for extra protection against leaks. Turn on the main water supply valve and check for any leaks. If all is well, your burst pipe repair is complete.
Preventive Measures

To prevent burst pipes, regular maintenance is key in pipe repair. Start by inspecting your plumbing system for any signs of damage or corrosion, especially in areas prone to freezing temperatures. Insulating exposed pipes can be an effective measure, as it reduces the risk of freezing and subsequent bursts. Additionally, consider installing check valves, which can shut off water supply in case of pressure buildup, a common cause of pipe damage.
Regular cleaning and inspection also play vital roles in pipe repair. Removing debris and mineral deposits can prevent clogs and the subsequent high-pressure backflow that may lead to pipe bursts. Additionally, checking for leaks and addressing them promptly is crucial, as even small leaks can indicate underlying issues that, if left unaddressed, could result in full-scale burst pipes.
Common Mistakes to Avoid

When it comes to burst pipe repair, there are several common mistakes that homeowners and even professional plumbers can make. One of the most frequent errors is trying to fix the issue temporarily with a quick patch instead of addressing the root cause. A burst pipe is often a sign of underlying issues like corrosion, old pipes, or poor installation, so it’s crucial to inspect and repair these problems thoroughly. Attempting a hasty fix might provide temporary relief but could lead to future leaks and more extensive damage.
Another mistake to avoid is not turning off the water supply immediately upon detecting a burst pipe. This step is essential to prevent further flooding and excessive water damage. Plumbers often recommend shutting off the main water valve located near the meter to control water flow. Neglecting this simple action can result in significant water waste and increased repair costs for both residential and commercial pipe repairs.
When to Call a Professional Plumber

If you notice a burst pipe in your home or office, it’s crucial to act quickly. However, before attempting any DIY repairs, consider the extent of the damage and whether it’s time to call in a professional plumber. Burst pipes can be caused by various factors such as freezing temperatures, aging infrastructure, or corrosion, and they often require specialized tools and knowledge to fix effectively.
Seeking professional help is recommended for several reasons: experienced plumbers can identify the root cause of the burst pipe, ensuring the problem is fully resolved; they have access to high-quality materials that can withstand future pressure; and they can offer long-term solutions, preventing future leaks or breaks. Pipe repair is not just about fixing a temporary fix; it’s an investment in maintaining your property’s plumbing system.